If you change tap washer, it can prevent dripping and water waste. Whether you’re a seasoned DIYer or just starting out, this guide will walk you through the process step-by-step, ensuring you have everything you need to tackle this common plumbing issue. With patience and the right tools, you can quickly fix your tap and enjoy a drip-free home.
Understanding the Tap Washer
A tap washer is a small rubber disc that sits inside your tap. When the tap is turned off, it creates a watertight seal, preventing leaks. Over time, however, these washers can wear out due to constant friction and exposure to water, leading to drips and leaks. Replacing them saves water and helps maintain your plumbing system’s efficiency.
In Australia, where water conservation is increasingly essential, fixing leaks can help reduce overall water usage. Over time, a tap that drips can waste up to 20 litres of water every day. By learning how to change tap washer, you’re not just fixing a minor issue; you’re also playing your part in conserving this precious resource.
Types of Tap Washers
Before diving into the replacement process, it’s helpful to know that tap washers are different types. The most common types include:
1. Flat washers: Typically used in compression taps.
2. O-ring washers: Commonly found in cartridge taps.
3. Ceramic disc washers: Often used in modern taps for better durability.
Identifying the type of washer in your tap will ensure you purchase the correct replacement when heading to the hardware store.
Benefits When You Change Tap Washer
Changing a tap washer has several benefits beyond just stopping annoying drips:
1. Water Conservation: Fixing leaks helps conserve water, which is vital in Australia’s dry climate.
2. Cost Savings: Reducing water wastage lowers your utility bills over time.
3. Improved Home Value: Well-maintained plumbing adds value to your home.
4. DIY Satisfaction: Completing home repairs builds confidence and saves money on professional services.
Pro-Tip: Having a few spare washers on hand can save you time in case another tap starts leaking unexpectedly.
Tools You’ll Need
Before you start, gather the following tools:
1. Adjustable wrench or spanner: This will help you loosen and tighten nuts and bolts.
2. Flat-head screwdriver: Useful for prying off decorative caps or for any screws that may need removal.
3. Pliers: Handy for gripping small parts or pulling out old washers.
4. New tap washers: Make sure they match the size of your old ones. You can check out the new washer by taking the old one to a hardware store.
5. Plumber’s lubricant: This will help your new washer fit smoothly and prevent future leaks.
6. Towel or cloth: Wipe up any spills and tidy your work area.
Having all these tools ready before you begin will make the process smoother and more efficient.
Step-by-Step Instructions
Turn Off the Water Supply
The first step in changing a tap washer is to turn off the water supply. Locate your water metre—usually found near the front of your property—or check if there’s an isolation valve underneath your sink. When you disassemble the tap, turning off the mains supply prevents water from gushing out. After you’ve turned it off, open the tap to remove any water still in the pipes. This step is crucial as it minimises mess and makes it easier to work on your tap.
Disassemble the Tap
Next, you’ll need to remove the tap handle. Depending on your tap design, this may involve unscrewing it from underneath or prying off a decorative cap first. If you need help with how to do this, consult your tap’s manual or look up a guide for your model online. Keep all screws and parts in a safe place—using a small container can help prevent losing any components during this process.
Remove the Old Washer
Once you have access to the internal parts of the tap, you’ll see the washer at the base of the spindle. Use pliers if necessary to carefully remove the old washer, ensuring that no remnants are left behind in its seat. If it’s stuck, gently wiggle it back and forth until it comes loose. Note how it was seated so you can install the new one correctly.
Install the New Washer
Now, it’s time to place the new washer into its seat. Make sure it fits snugly. It should sit flat without any gaps around the edges. This step is vital for keeping leaks from happening again, so take your time. Applying a plumber’s lubricant around the edge of the washer can help ensure a good seal and make future replacements easier.
Reassemble the Tap
After installing the new washer, reverse the disassembly process: reattach any internal components securely without overtightening, as this could damage delicate parts or cause misalignment. Once everything is back in place, reattach the handle and decorative caps.
Test for Leaks
With everything reassembled, turn on the mains water supply again and check for leaks around the newly installed washer. Open and close your tap several times to ensure everything functions properly. You may need to recheck your installation or tighten specific components if you notice any drips.
Final Check
It’s wise to monitor your tap for any signs of leakage over the next day or so after you’ve completed your repair. This tactic will give you peace of mind that everything works as it should.
Pro-Tip: Invest in good-quality washers rather than cheap ones. They last longer and reduce future maintenance.
Changing a tap washer is not just about fixing a leak. It’s about taking control of your home maintenance and saving money in the long run. I remember when I first tackled this task myself. It felt great to resolve an annoying drip without needing to call a plumber! It’s rewarding to know that I could improve my home’s plumbing situation with just a few simple steps.
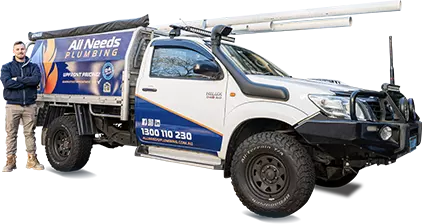
What if I need help on how to change tap washer?
At All Needs Plumbing, we understand that sometimes DIY isn’t an option or things can get tricky. That’s why we offer a $0 callout fee, with 24/7 same-day service available for urgent issues. In addition, seniors get a 15% discount, and hot water systems are $150 off! Don’t hesitate to reach out. We’re here to help you with all your plumbing needs!