Are you tired of dealing with pesky plumbing issues like leaks or blockages? If so, DIY pipe relining might just be the solution you need. This innovative method allows you to repair damaged pipes without the hassle of digging up your yard or disrupting your property. By inserting a new lining into your existing pipes, you can create a durable “pipe within a pipe” that effectively resolves various plumbing problems. Let’s dive deeper into what DIY pipe relining involves, how it works, and the many benefits it offers to homeowners like you.
Understanding DIY Pipe Relining
The process of DIY pipe relining starts with a thorough inspection of your pipes. Using a CCTV drain camera, you can assess the extent of any damage. This step is crucial as it helps determine if relining is the right solution for your situation. The camera provides a clear view of blockages, cracks, and other issues that may not be visible from the surface.
Once you’ve identified the problems, it’s time to clean and prepare the pipes. High-pressure water jetting is effective in removing debris, blockages, and tree roots that may be causing issues. This cleaning process ensures that the surface is smooth and ready for the new lining.
After cleaning, you’ll insert a resin-saturated liner into the damaged pipe. This liner is then inflated and cured in place, creating a new inner surface that is strong and seamless. The beauty of this method is that it can be completed in just a day or two, significantly faster than traditional pipe replacement.
The Step-by-Step Process of DIY Pipe Relining
Inspection
Start by using a CCTV drain camera to inspect your pipes. This will help you identify any cracks, blockages, or damage that needs addressing.
Cleaning
Use high-pressure water jetting to clean out your pipes thoroughly. This step is essential as it removes any debris or buildup that could interfere with the lining process.
Preparation
Measure and cut your resin-saturated liner to fit the length of the damaged section of pipe.
Insertion
Insert the liner into the pipe using an inversion method or air pressure to ensure it fits snugly against the walls.
Curing
Inflate the liner and allow it to cure according to the manufacturer’s instructions. This usually involves letting it set for several hours until it hardens.
Final Inspection
After curing, conduct another inspection with your CCTV camera to ensure everything has been installed correctly and there are no remaining issues.
Benefits of DIY Pipe Relining
Cost-Effective
DIY pipe relining can save you money on expensive excavation and repair costs. Traditional methods often involve extensive labour and material costs due to digging up your yard or driveway.
Minimal Disruption
Since this method is trenchless, it reduces mess and disruption to your property. You won’t have to worry about landscaping damage or having your garden torn up during repairs.
Long-Lasting Solution
The new lining creates a durable barrier that can withstand the demands of your plumbing system. With proper installation, these liners can last for decades, offering peace of mind.
Versatility
It works on various pipe materials and configurations, making it suitable for different plumbing issues. Whether you have PVC, clay, or cast iron pipes, relining can often be applied effectively.
Environmentally Friendly
By choosing to reline instead of replace, you’re reducing waste and minimising your environmental footprint. This method keeps old pipes out of landfills and conserves resources.
Improved Flow
The smooth surface created by relining enhances water flow through your pipes, reducing the risk of future blockages.
Reduced Risk of Future Damage
The new lining protects against corrosion and other forms of deterioration that can lead to future plumbing issues.
I once faced a significant plumbing issue at my own home when I discovered tree roots had invaded my sewer line. After considering my options, I opted for DIY pipe relining instead of traditional replacement. The process was surprisingly straightforward and saved me from extensive digging in my backyard.
I remember feeling anxious about tackling such a big job myself but was pleasantly surprised by how manageable it was with proper preparation and guidance. I was thrilled to see how quickly I could restore my plumbing without the usual chaos associated with major repairs.
The satisfaction of completing the job myself was rewarding as well. Not only did I save money, but I also gained valuable knowledge about my plumbing system in the process.
Pro-Tips for Successful DIY Pipe Relining
Inspect Thoroughly
Always conduct a detailed inspection before starting the relining process to ensure you understand the damage fully. A clear understanding will help you choose the right materials and techniques for your specific situation.
Use Quality Materials
Invest in high-quality resin and liners to ensure a durable repair that lasts. Cheaper materials may save you money upfront but can lead to more problems down the line.
Follow Instructions Carefully
Each product may come with specific instructions for installation. Make sure to follow them closely to achieve the best results.
Consider Professional Help if Needed
If at any point you feel overwhelmed or unsure about the process, don’t hesitate to reach out for professional assistance. Sometimes it’s best to leave complex tasks to experts who can ensure everything is done correctly.
Document Your Work
Take photos during each step of your project for future reference or if you need to show someone else what you’ve done later on.
What if I want to know more about DIY relining?
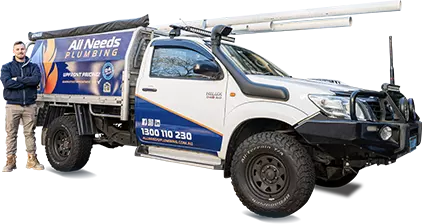
If you’re interested in learning more about DIY pipe relining or need assistance with your plumbing issues, we’re here to help at All Needs Plumbing! We offer a $0 callout fee, provide 24/7 same-day service, and extend a 15% seniors’ discount on our services! Plus, when you choose us for your hot water systems, enjoy $150 off!
Contact us today to discuss how we can assist you with all your plumbing needs! Our team is ready to provide expert advice and support tailored specifically for you! Whether you’re looking for tips on tackling DIY projects or need professional help with repairs, we’ve got you covered!